

How To Repair A Hole In The Ceiling With Texture
Introduction
You've fixed your leaky roof and replaced the moisture insulation in your attic—now what do you exercise well-nigh the unsightly pigsty over your head where that soaking mess dripped through your gypsum ceiling? Y'all cut a piece of drywall to fit, fasten information technology securely, fill up in the gaps with joint compound, and smooth out the patched areas to lucifer the texture of your undamaged ceiling. Paint to lucifer and voila! you tin can check your ceiling off your "to exercise" listing! This guide will show you how.
A few basic precautions will get y'all through this repair safely and successfully:
- Reduce tripping hazards by clearing furniture, pets, and people from the area under the repair
- Use drop cloths or painter's cloths to encompass the repair zone and grouping your tools and materials several feet from the base of your ladder
- Place the ladder squarely beneath the expanse you're repairing so you won't overextend your reach or get overbalanced
- Ask a friend to help if materials are too heavy or awkward for you to handle on your ain
- Ever wear center protection when working with materials above your head
-
-
Determine the distance to the rafters on each side past measuring above the ceiling to the centre of the exposed beam. Picture show 1.
-
Add 3/4" to that measurement and measure the same way below the ceiling. This ensures your cutting will be fabricated along the judge center of the rafter. Measure and mark with a pencil at several points, then draw through them to marker the cut lines you'll make right up the center of the ceiling rafter on each side. Pic 2.
-
Starting at the end of the rafter in the middle of the hole, measure outward to a betoken where the ceiling is undamaged. Mark it at the center and on each side, then draw a line through to intersect with the lines fatigued upwards the centers of the side rafters. Pic 3.
-
-
-
Connect your pencil marks forth each length.
-
-
-
Cut by laying the framing square flat on the ceiling parallel to the area to be trimmed away and drawing the blade of your utility knife direct downwards along its border, making a clean, shallow cutting in the solid material. Motion picture 1.
-
Support the piece being cut away with your free hand, deepening the cuts until you have cutting completely through and the damaged slice can be removed. Picture show 2.
-
-
-
Prepare the opening for the new piece by pulling nails and removing any screws on the underside of the rafters to ensure a apartment mounting.
-
Use the 6" taping knife to skim away a swath of the popcorn texture along the edges of the undamaged ceiling surrounding the opening.
-
-
-
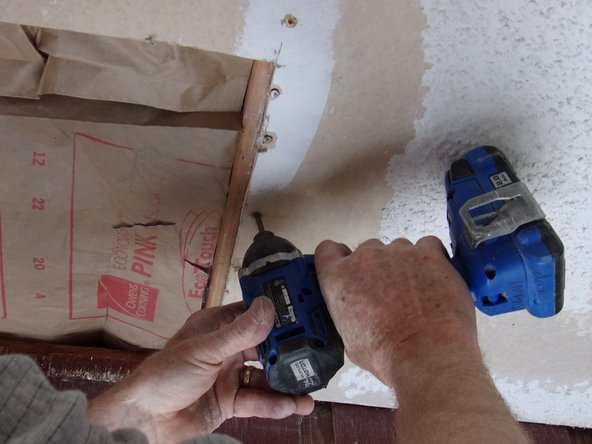
Stabilize the sections of undamaged ceiling around the opening with drywall screws placed a little back from the edge—this helps to avert crumbling or buckling of your nice, clean-cut edge. Film 1.
-
Use enough force per unit area when driving screws so that the screw heads imbed slightly into the wallboard surface.
-
Concur the screw gun at a slight bending and drive screws into the side rafters, starting the screws a little back from the edge as before. Picture show 2.
-
-
-
Use your utility pocketknife to cut the new piece of wallboard, making it a trivial smaller than the actual size of the ceiling opening, so that the installed piece volition accept a small gap around the edges.
-
-
-
Mark an arrow on the wall (or trim piece, as shown) and another arrow on the existing ceiling opposite, both pointing to the center of the centre ceiling rafter. Movie 2.
-
-
-
Dry fit the new slice into position (don't attach yet). It should be flush with the existing ceiling, rest on half a ceiling rafter on each side, and have a slight gap effectually the edges. Motion picture one.
-
Dry fit once again after trimming. Use the framing foursquare and pencil to draw a line from the trim arrow to the ceiling pointer you marked in Stride 4. Pic two.
-
-
-
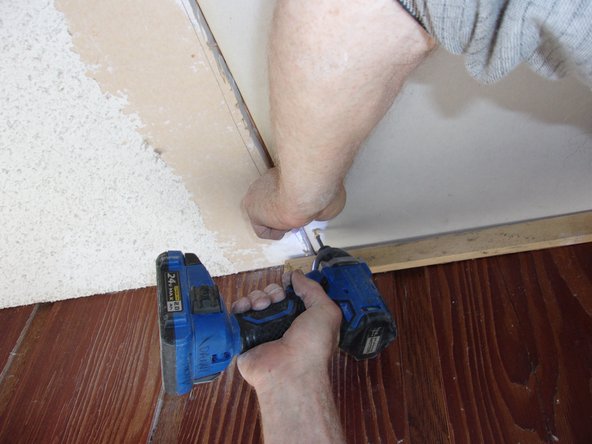
Slide the new slice into position. Concur it in identify with the forearm of your costless hand every bit y'all affix the new slice to the middle ceiling rafter along your penciled line. Pic 1.
-
Attach the new piece to the rafters on each side, placing the screws a lilliputian back from the edge as before and angled slightly into the rafter. Pic 2.
-
Ballast both sides with screws spaced evenly from corner to corner. Motion-picture show 3.
-
-
-
Encompass the cutting lines with strips of self-sticking mesh tape, overlapping the ends. Press lightly to assistance them stick—yous might accept to do i at a fourth dimension if gravity starts working against you.
-
-
-
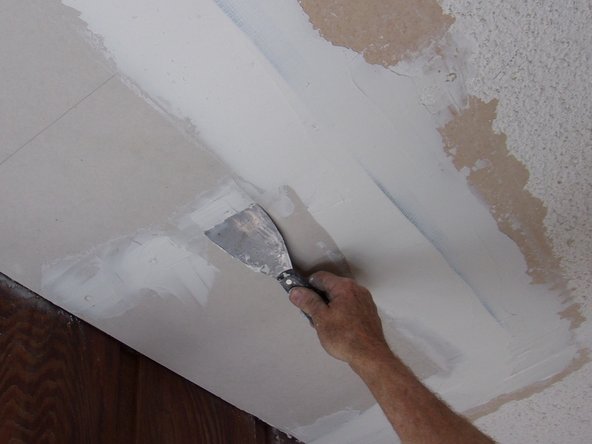
Employ the 3" putty pocketknife to scoop up the pre-mixed joint compound and employ liberally along the mesh tape, working the articulation chemical compound through the mesh holes and completely filling the gaps along the wallboard edges. Pic ane.
-
Continue working your way forth each cut line, smoothing the joint compound along over the top of the mesh tape to embrace information technology completely, both lengthwise and side to side. Picture 2.
-
-
-
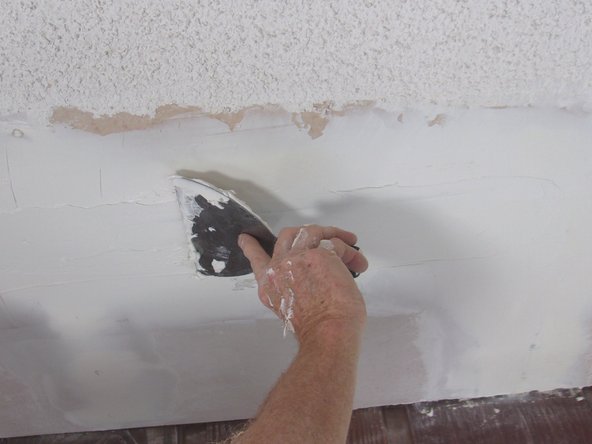
Switch to the 6" taping pocketknife and continue applying articulation chemical compound in smooth swaths, working both side to side and lengthwise along the repair lines, until you have a flat, compatible layer that feathers over onto the existing ceiling. Pic 1.
-
Your layering should completely conceal the mesh tape; pay item attention to overlapped corners where it is thicker—the idea is to alloy the new piece with the existing ceiling then the repair isn't obvious. Film 2.
-
Use articulation chemical compound to fill the slight depressions over each spiral and any blemishes in the surface of the new piece. Moving picture 3.
-
-
-
When dry, sand repaired areas lightly with 100 dust sandpaper or sanding sponge. Sand in a round motion with light force per unit area so the area is smoothed but doesn't cause the mesh tape to become exposed. Moving picture 1.
-
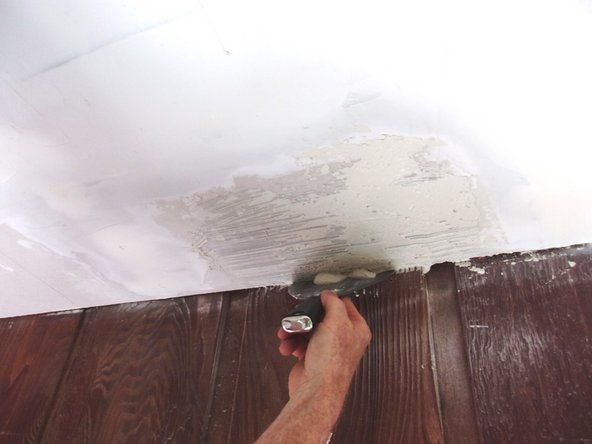
For popcorn ceilings, pat repairs with a lightly dampened sponge after sanding, then apply the popcorn mixture with the vi" taping knife. The mixture is heavy and soggy, then apply a sparse layer and let dry out, so employ boosted coats until the texture matches the rest of your ceiling. Pic 3.
-


Conclusion
Repairing a hole in your ceiling is more time-consuming than difficult, and now, doesn't it look dainty? Proficient task!
Embed this guide
Choose a size and re-create the code beneath to embed this guide equally a small-scale widget on your site / forum.
Preview
Source: https://www.ifixit.com/Guide/How+to+Repair+a+Hole+in+the+Ceiling/140181
0 Response to "How To Repair A Hole In The Ceiling With Texture"
Post a Comment